Adapting my Surly Rear Rack to work with Topeak MTX bags & baskets
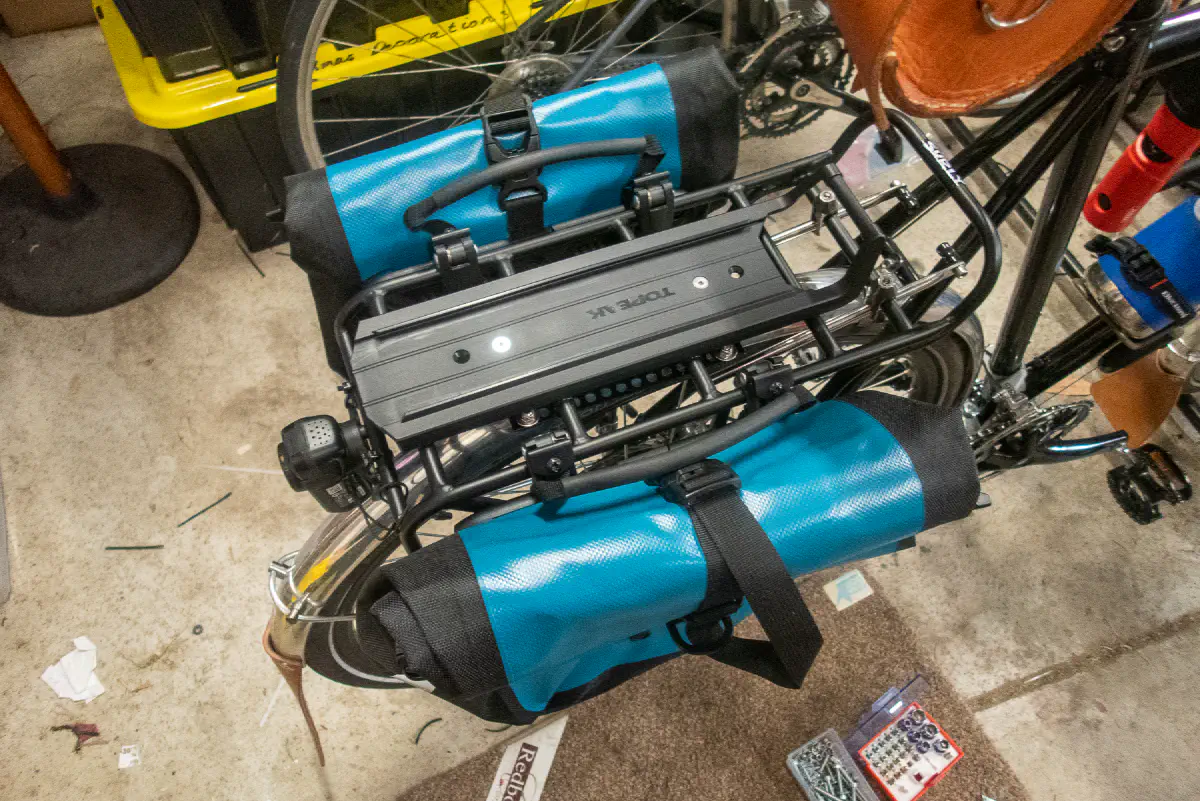
So I bought a brand new Surly Disc Trucker in June, fitted it out with Surly front and rear racks, and now use this bike as my primary commuting bike, and when COVID-19 is past us/travel is open to us Victorians again, I hope to take her on some tours, both locally and abroad.
My previous ride is a Giant hybrid commuter that I had fitted out with a Topeak MTX Beamrack, which was fantastic for me to use with my everyday MTX EXP “trunk bag”, my TrolleyTote — I don’t make up the names for these! — which I used for groceries and other items that didn’t fit in my trunk bag, and another open wire-style basket I’d originally had first but still fit and sometimes got a run for light trips like getting bread and milk. Having invested in this little ecosystem of Topeak products I still wanted to use them on my Surly for commuting around town, as well as be able to use my Ortlieb panniers for touring.
So I grabbed a “Omnitrack Adapter”, which I had to purchase online from Frankfurt, Germany in the middle of the initial COVID cycling gear shortage as every other distributor in the world that I could find was sold out. I waited weeks and weeks for it to arrive, and lo and behold, I was foiled by something as simple as: the mounting brackets only fit to rack bars that run parallel to the bicycle, not perpendicular. I got past my first instinct (scrap the lot and just use my Ortliebs, saying goodbye to Topeak’s system forever) and jury rigged a nice little bracket that I’m quite proud of, so I thought I’d post it up in case anybody else ever got some use out of it.
How I adapted my adapter
Step 1: Adapt mounting brackets
The Omnitrack Adapter comes with two mounting bracks bolted beneath it, in optional forward/back mounting places (two each respectively). The mounting bracket itself can be adjusted to grip onto narrow or wider racks, but only horizontally/parallel to the wheel. They don’t turn or pivot for perpendicular bars such as the Surly Rear Rack features, nor do they extend wide enough to grip the parallel bars.
I noticed with close inspection that there is a rubber “foot” at each end of the mounting bracket, ostensibly to protect the rack it’s gripping and provide some cushioning between metal and plastic. If you remove this little bit of rubber there remains a 4mm diameter hole. Now, all my bolts are M5 (5mm) so I drilled mine to widen it slightly, so if I want to put the rubber feet back in I’d have to glue them, but if you’ve got 4mm bolts you might get away with a completely non-destructive solution.
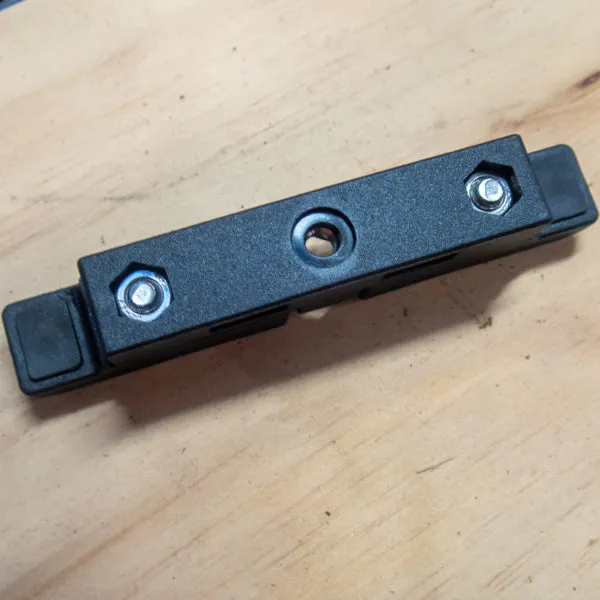
Topeak Omni Quicktrack Adapter mounting bracket, for attaching the adapter to a standard bike rack. The ends can be adjusted to fit wide or narrow racks but don’t swivel/pivot.
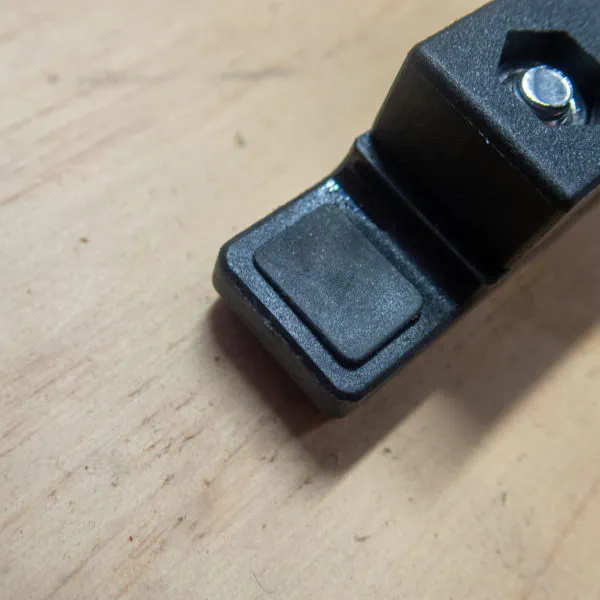
Up-close view of the Topeak Omni Quicktrack Adapter mounting bracket foot
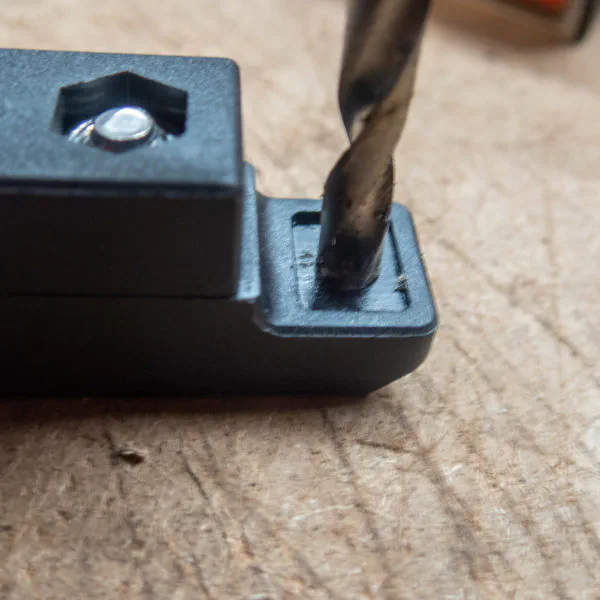
Drilling out the hole to widen from 4mm to 5mm for an M5 bolt.
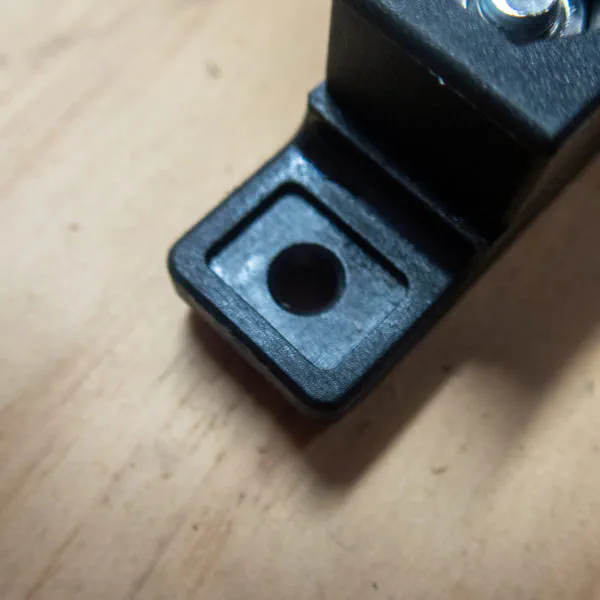
Rubber foot removed and 4mm hole widened to 5mm.
Step 2: Fit cross-beams to brackets
I had two pieces of pre-drilled steel spacers already laying around from some previous product/tinkering, I can’t remember where I got these. I got very lucky in that the holes just lined up beautifully with the spacing on the Quicktrack Adapter but you could easily use any piece of steel and drill your own holes, either M4 or M5 (5⁄32″ or 13⁄64″ in Freedom Units) depending on your bolts.
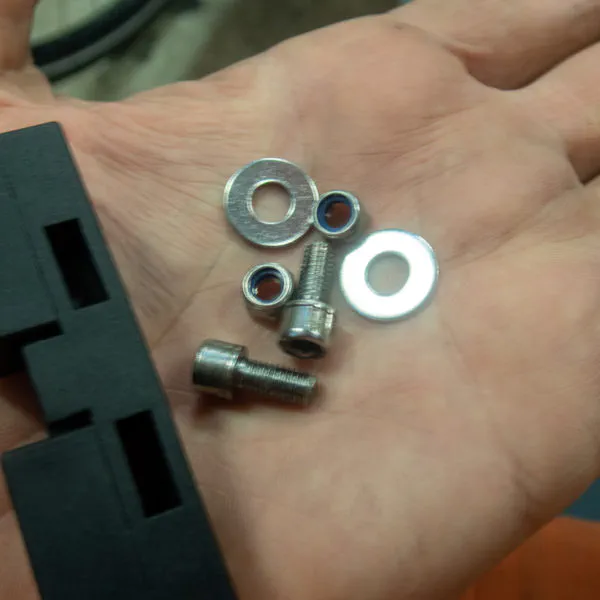
Some M5 hex bolts, washers and nuts.
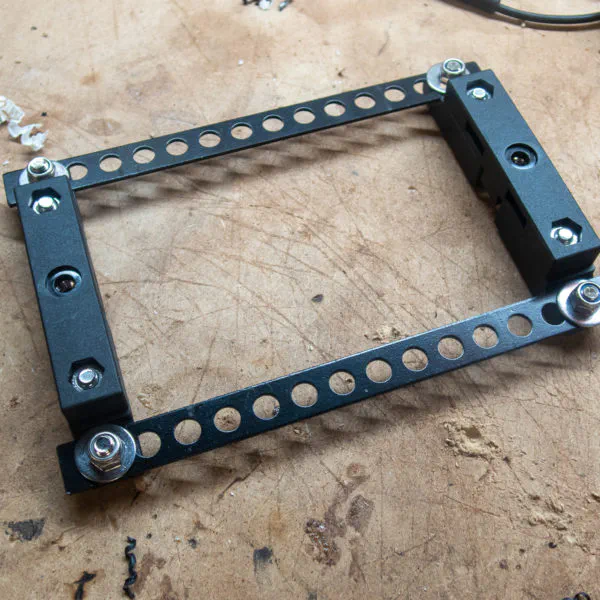
Brackets fitted to steel cross-sections to allow for zip tying/bolting to the rack.
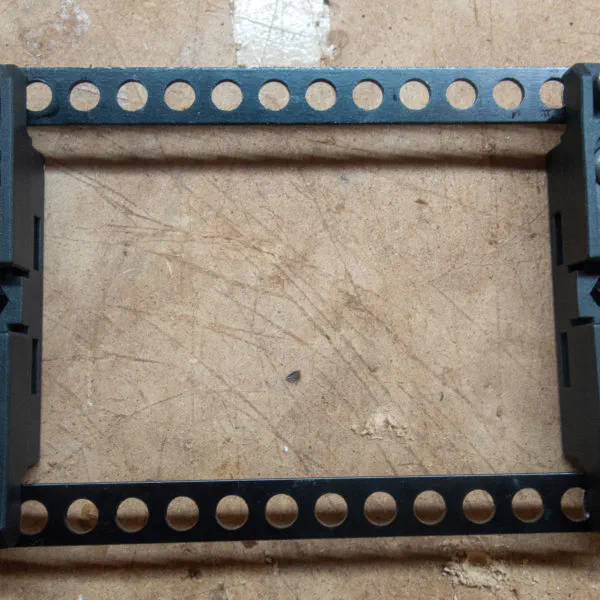
Flipside of assembly. Notice on the ends of each mounting bracket the adjustable ‘wingspan’ of the brackets.
I found it much easier to place the head of the bolt in the bottom of the mounting bracket (upside down) due to the lip at each side of the hole causing difficulty in getting a good grip on the nut with my spanner. So I used lock-nuts to ensure the bolts don’t work their way loose.
Step 3: Fit to Surly Rear Rack
With the assembly complete and fairly rigid, the next part was as simple as finding a way to attach it to the Surly Rear Rack. I did it with strong zip/cable ties, but you could just as easily use a proper mounting bracket if you had the right size. I found that when I fit the actual Quicktrack Adapter on top and tensioned it, it added a little more stability to the rack. I doesn’t move unless I really give it a strong go, so I’m fairly confident it will stand up to my daily lighter-weight commute. I’d maybe have to reinforce it a little if I wanted to carry heavier gear in the rack for a tour, but the beauty of zip ties is that I could just as easily cut them off and re-zip when I get back.
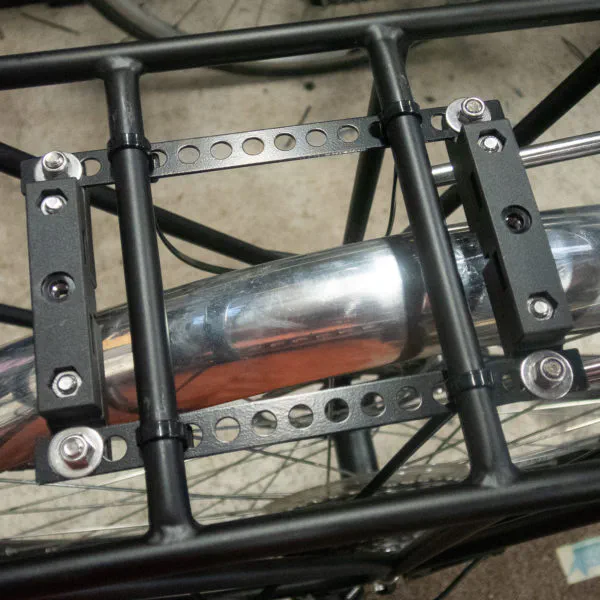
Assembly mounted on the Surly Rear Rack using zip/cable ties.
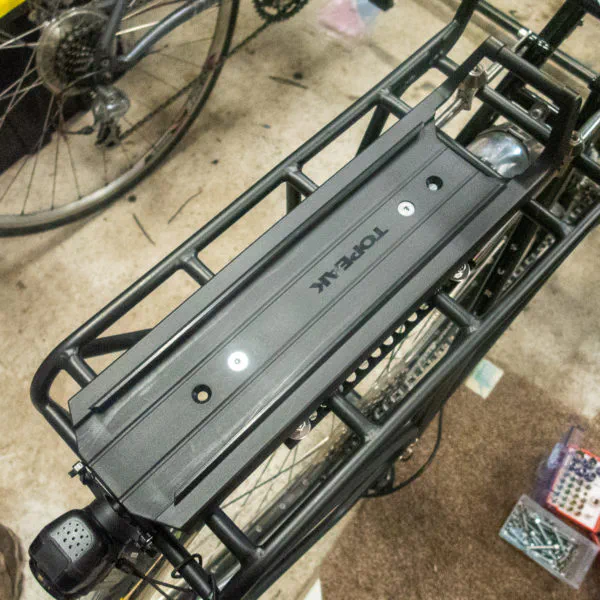
Topeak Adapternow mounted to a Surly Rear Rack
Bonus: I can also fit my Ortlieb panniers (with the QL2.1 attachment system) without removing the adapter at all. Sadly, I can’t have the Ortliebs AND the Topeak trunk bag at the same time, but the trunk bag sides expand out to side panniers so I reckon I’m covered.
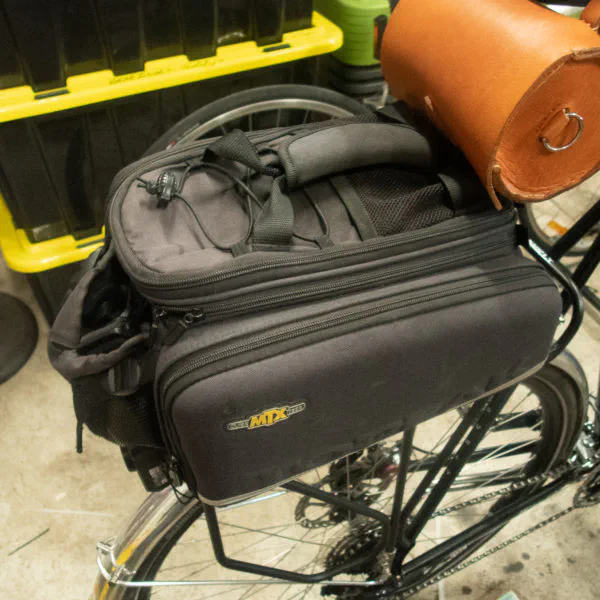
Topeak MTX bag on the rack
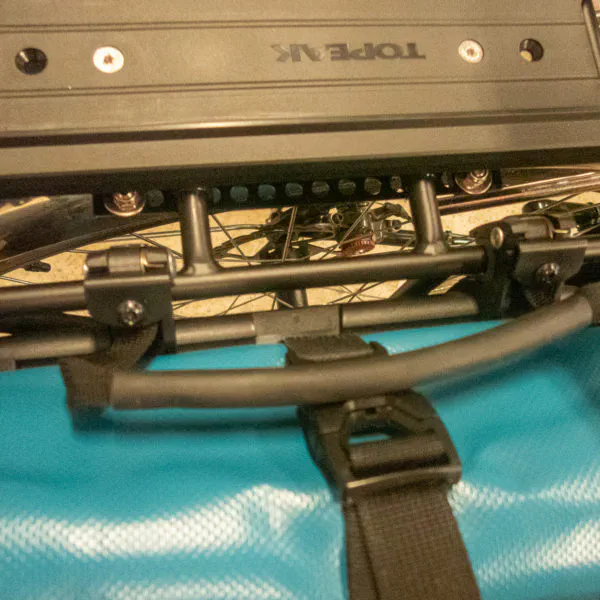
Appropriate clearance for Ortlieb QL2.1 pannier clips alongside Topeak adapter
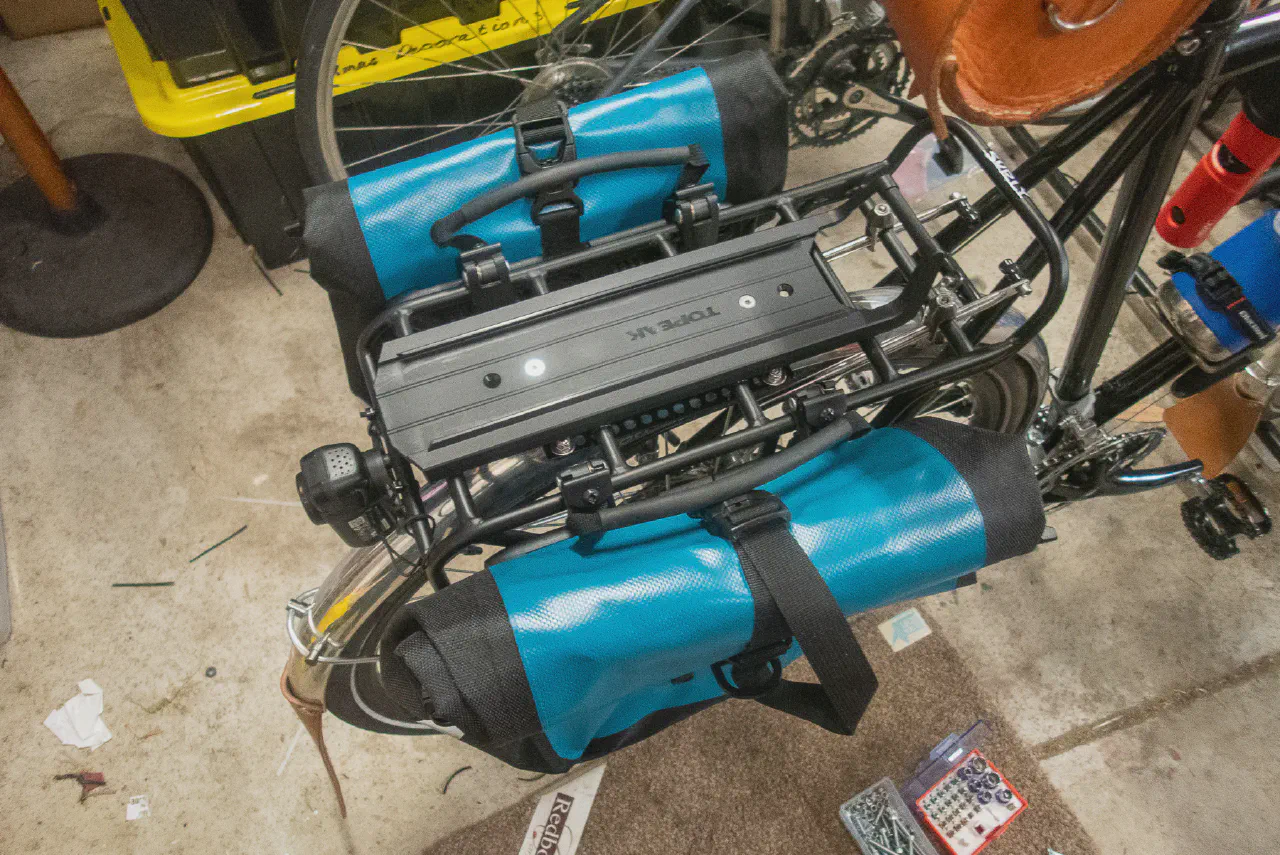
Rack can now carry either Topeak MTX bags/carts/etc or Ortlieb panniers without changing setup.